
Estimated reading time: 17 minutes
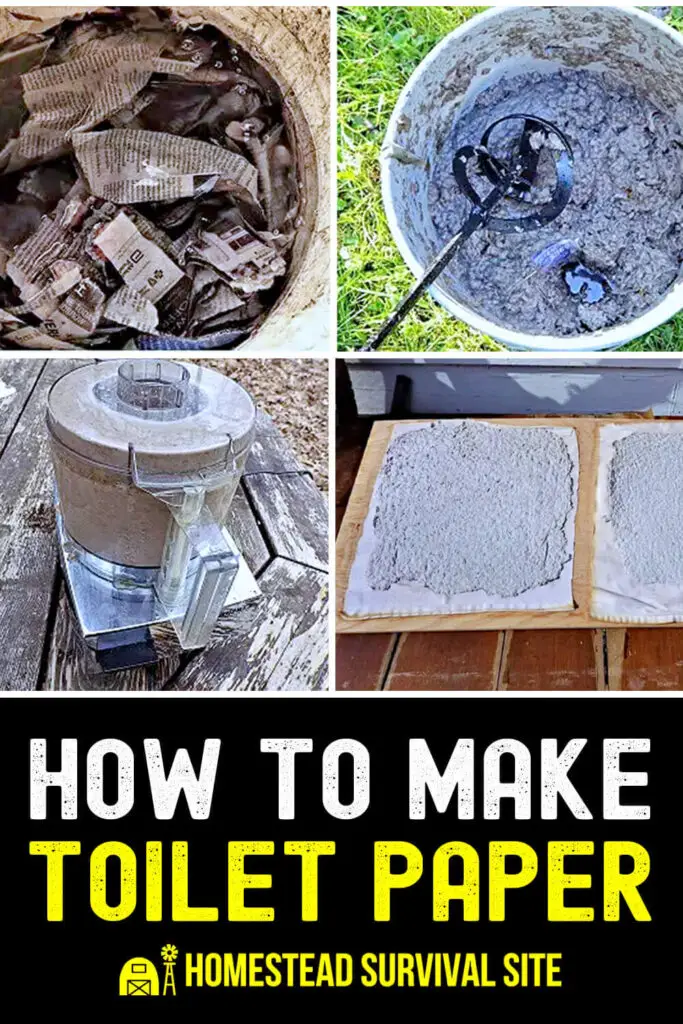
Tired of Standing in Long Lines and Fighting Over Toilet Paper? Make it Yourself.
One of the curious unintended consequences of the COVID-19 Coronavirus pandemic is a global obsession with the accumulation of toilet paper. Who knew that we so dearly treasured this everyday item? Fortunately, toilet paper is fairly easy to make.
Want to save this post for later? Click Here to Pin It On Pinterest!
The British and Their World War II Solution
In 1940, Britain found itself at war and blockaded by U-boats cutting off their supply chain by sea. Ships from convoys did make it through the German U-Boat wolfpacks but none transported toilet paper. As a result, they just crumpled and uncrumpled newspapers a few times and were ready to go.
Just so you know, it works but maybe we could improve on that just a bit.
Possible Paper Sources
- Recycled paper. Newspapers and paper bags are best. Cardboard? Not so good.
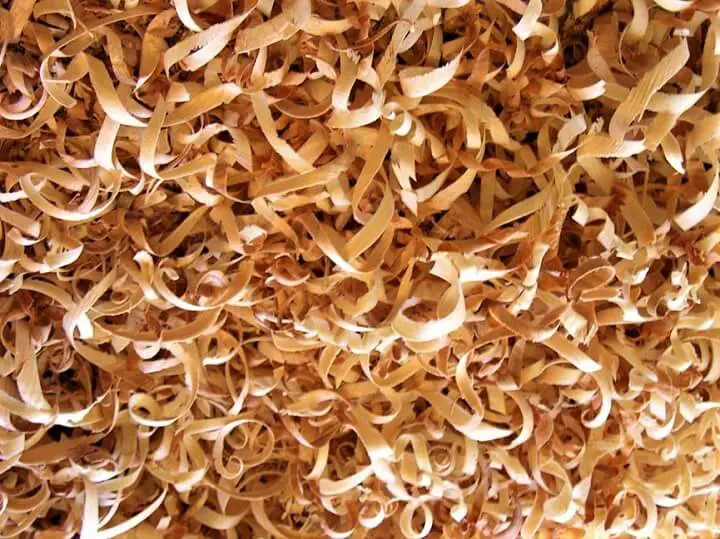
- Wood shavings. These are shavings planed off a log.
Between the two you’ll get a better result with recycled paper. The critical success factor for making toilet paper from wood shavings is to cut the shavings as thin as possible and process them in the food processor for 5 to 10 minutes.
Regardless of how much you pulverize or process you’re not going to get the soft, thin fluffiness we are so used to. The good news is you should get a result that’s better than dry oak leaves and a step above crumpled newspaper.
The Basic Process
There are eight steps to the basic process. Here’s what you have to look forward to.
Note: This is a mess, so you'll want to do this outside.
1. Soaking your raw materials in water.
2. Pulverizing the paper or woody material with a paint mixer on a drill or in a food processor.
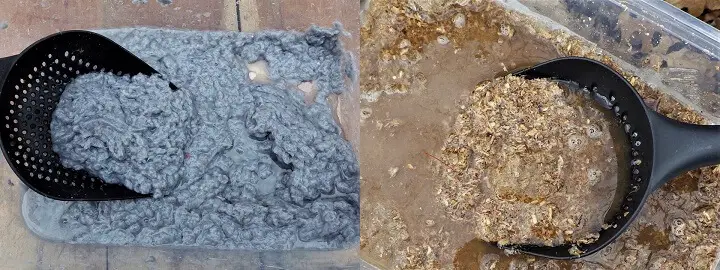
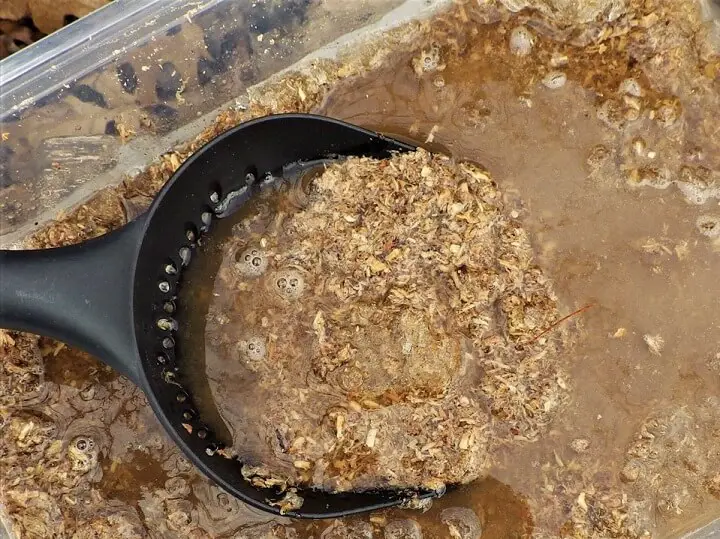
3. Straining and draining the paper. We’ll use a slotted ladle to gather the pulp and drain it somewhat.
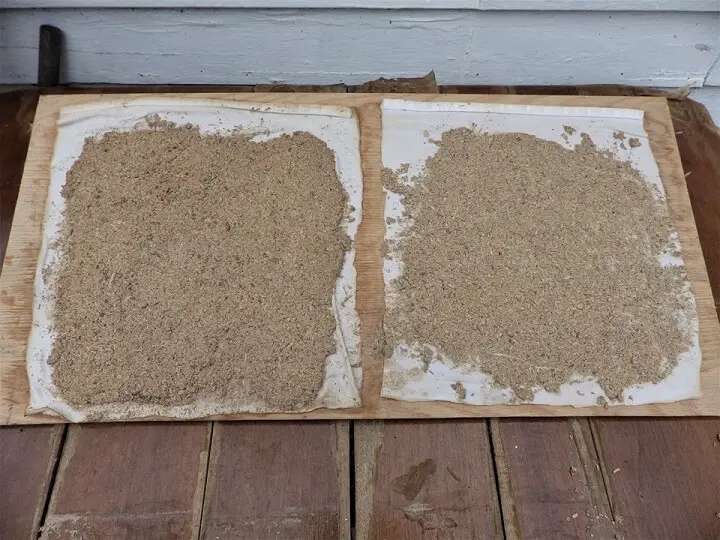
4. Couching (pronounced “cooching”) the paper on fabric like a piece of an old sheet cut into 1-foot squares.

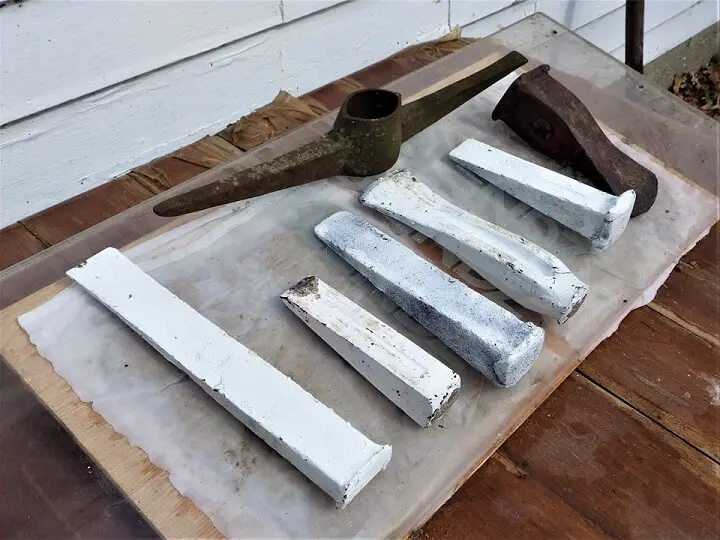
5. Pressing the paper between two large, weighted flat surfaces to flatten it and remove additional moisture. You also will be gently rolling it out after the initial pressing with a rolling pin.
6. Drying the paper while it is still adhering (cooched) to the fabric.

7. Checking and continuing to dry if the paper is still moist on the side that was adhering to the fabric.
8. Separating, cutting, and stacking the paper.
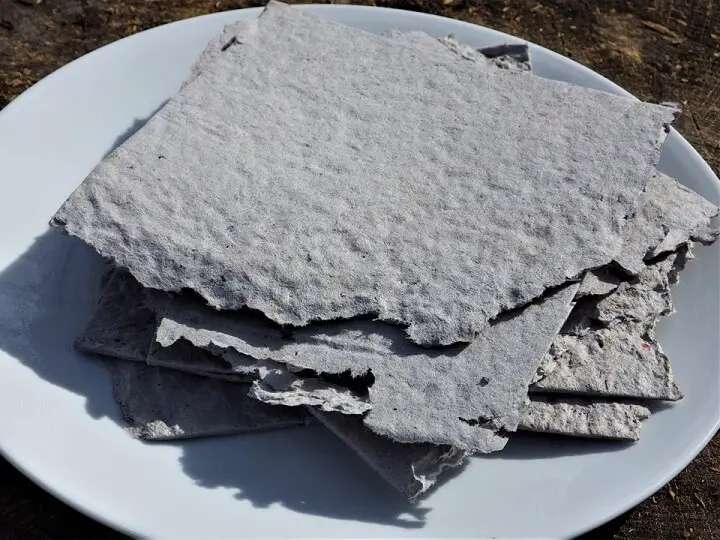
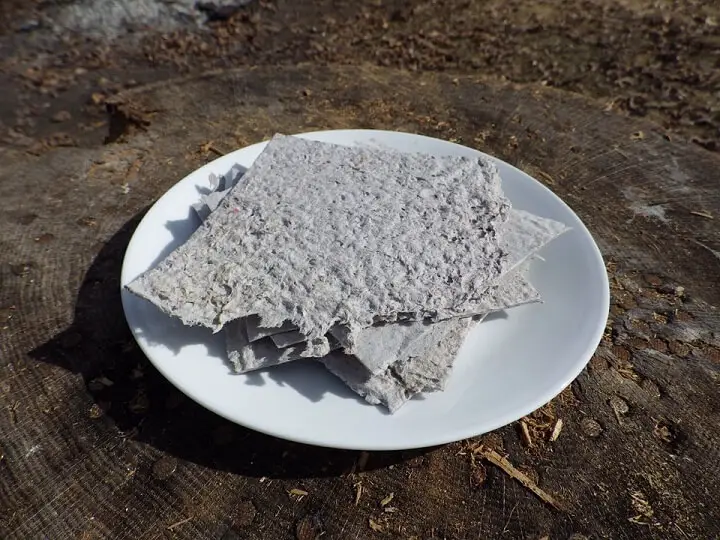
Here’s what you should end up with:
For this article, we're going to make toilet paper from recycled paper and toilet paper from wood shavings. We'll start with the recycled paper…
Making Toilet Paper from Recycled Paper
Materials:
- Old newspapers or any other paper you’re ready to recycle.
- 5-gallon bucket.
- Water.
- Bleach (optional) Never combine bleach with vinegar!
- Drill and paint mixer.
- Slotted ladle or large slotted spoon for draining.
- Two flat surfaces for pressing.
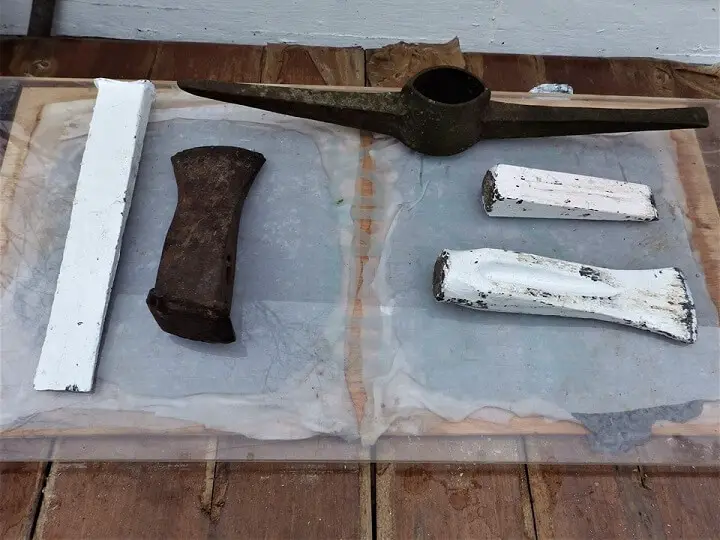
- Weights for pressing like rocks, iron tools, bricks, logs.
- 10 sheets of fabric cut into 1-foot squares.
A note on process: The process for making toilet paper from recycled paper is somewhat similar for making toilet paper from wood shavings. How much raw material you use is up to you. Start with smaller batches until you get the hang of the process, and then you can scale it up. We’ll briefly recap any steps that are redundant as we go through the various materials and recipes.
Directions:
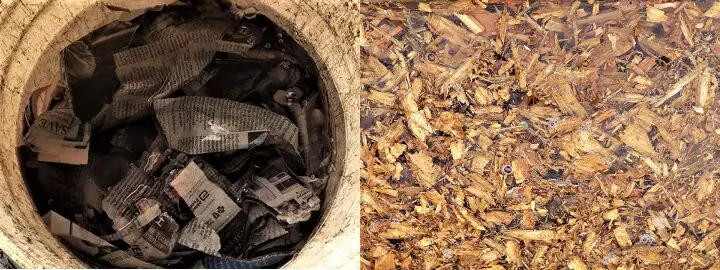
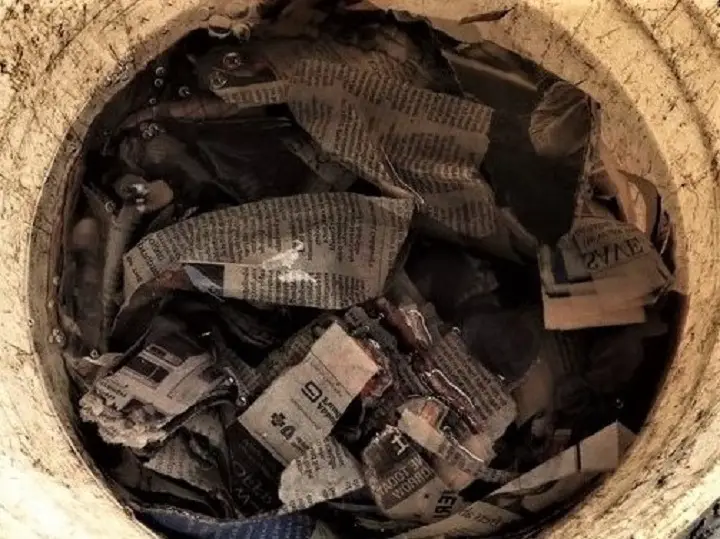
1. Tear the paper into strips and drop into a 5-gallon bucket 2/3 full of water.
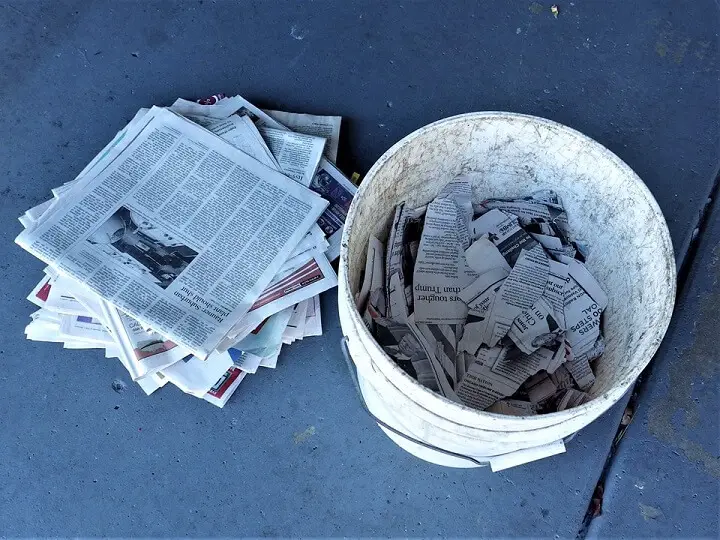
2. Allow the paper to soak for 2 hours.
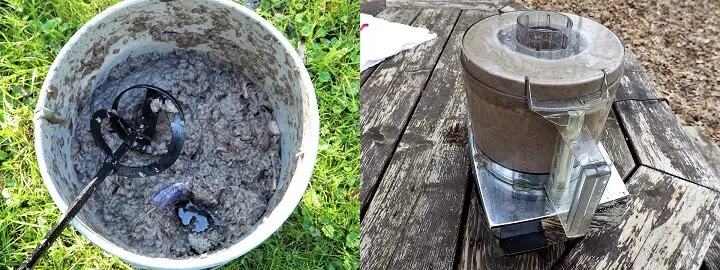
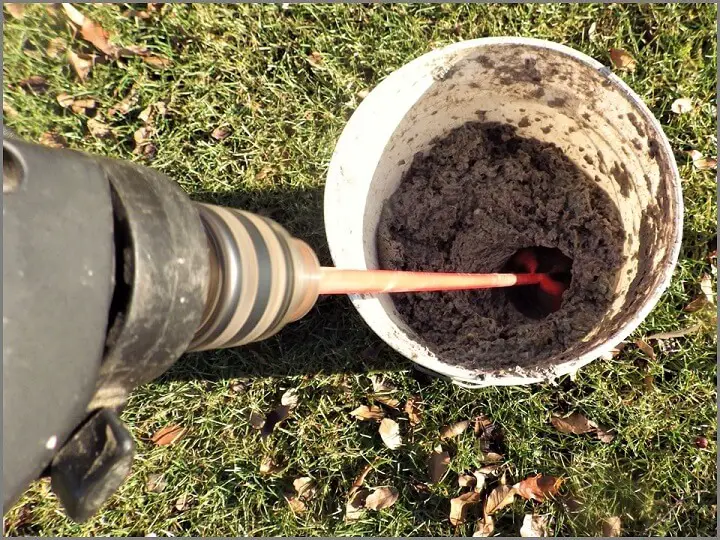
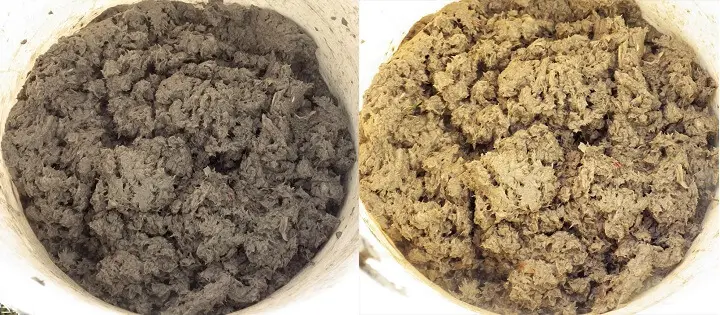
3. Using a paint mixer on a drill, pulverize the soaked paper. Make sure you have plenty of water to make a thin slurry. Move the mixer up and down to pulverize all the bits. You may need to add water as you go.
4. If you don’t have a septic tank and want to brighten the color of the finished paper, add two cups of bleach to the bucket and stir. Let it sit for an hour. The paper pulp won’t get bright white, especially with a newsprint that has a lot of black ink, but it will be lighter.
5. Lay the 12” x 12” fabric on a flat surface.
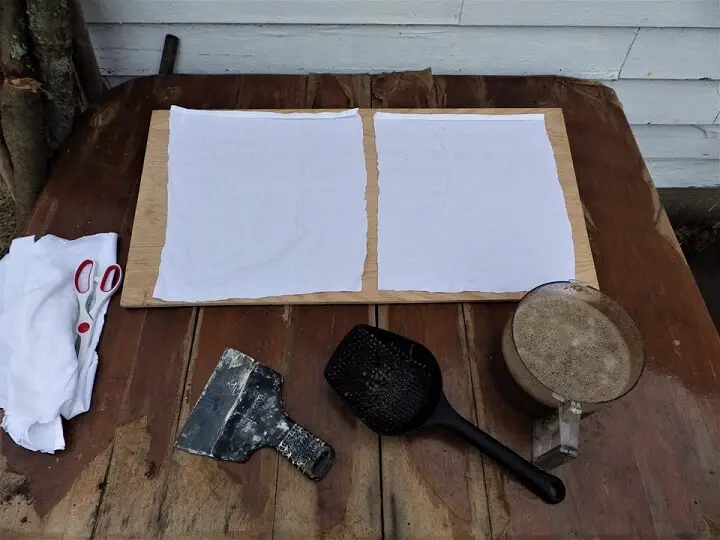
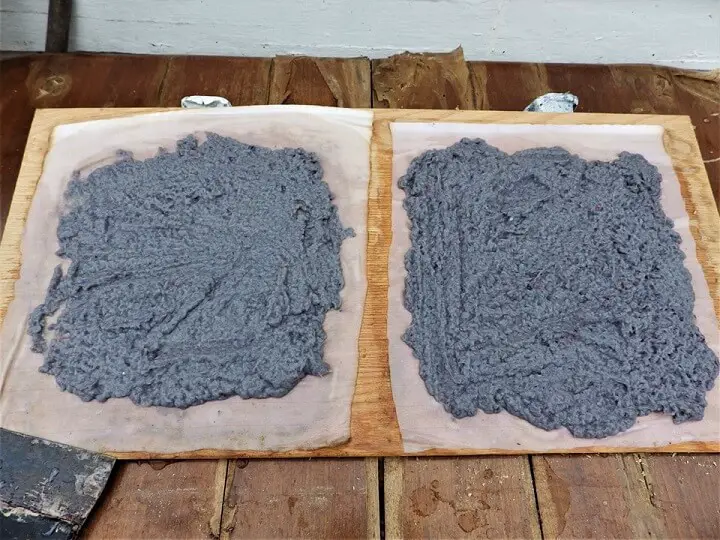
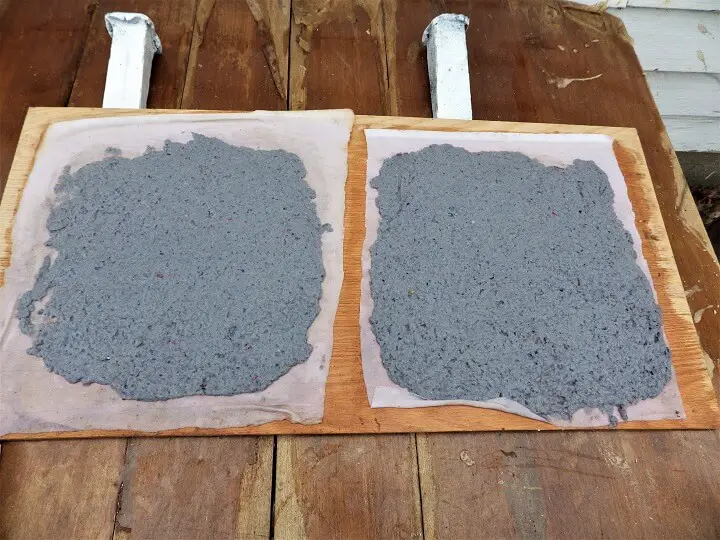
6. Ladle out the pulp with a slotted ladle and plop about a cup onto the center of one of the sheets of fabric.
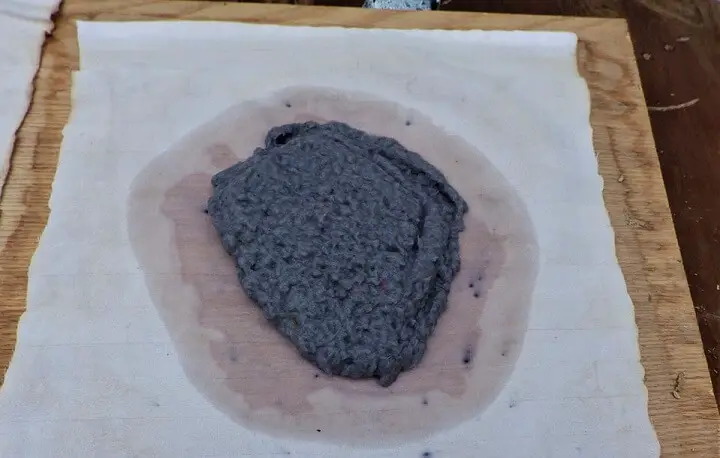
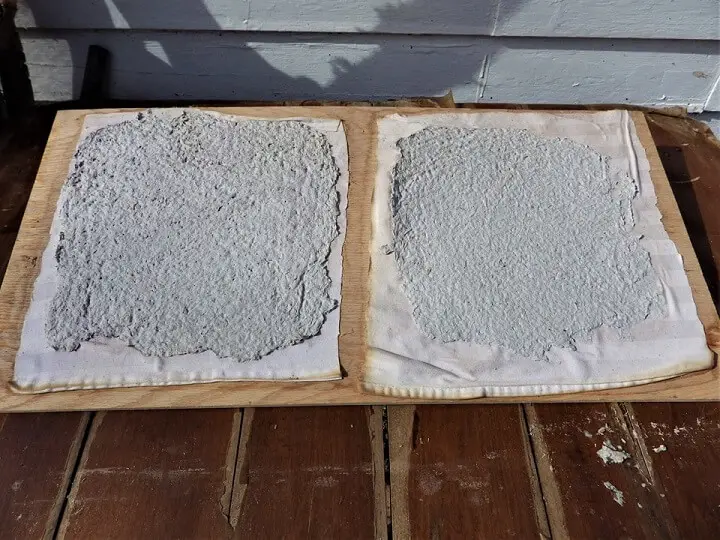
7. Spread the pulp on the fabric with a broad paint scraper, leaving about 1 inch around the edges. This is called couching.
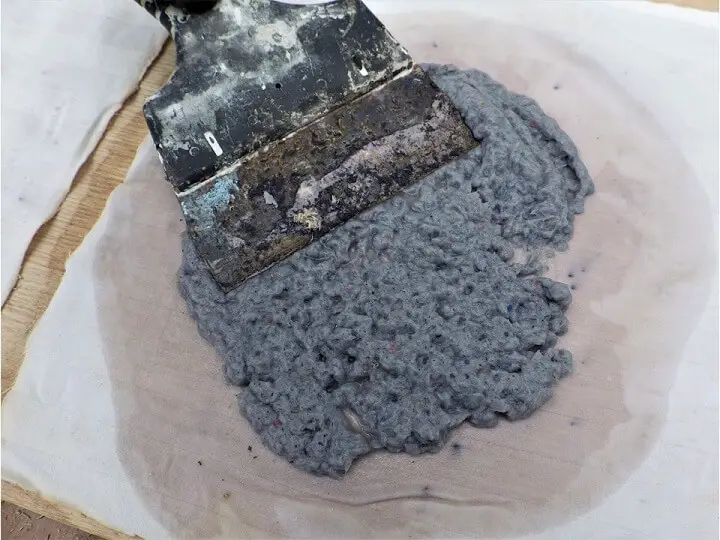
8. Continue to spread with the paint scraper so it’s as evenly distributed as you can make it.
9. Cover the pulp with the other sheets of fabric.
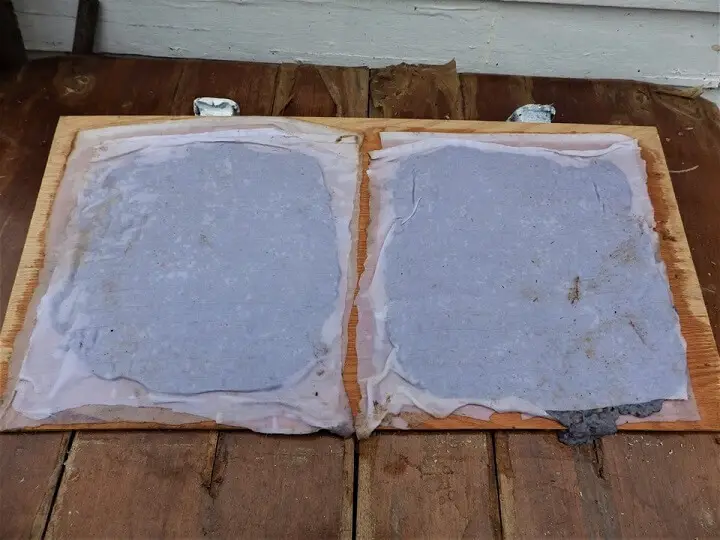
10. Put another flat surface (2’ x 4’ plywood) over the couched pulp. We’re using a large sheet of plexiglass. Top with weights to press the pulp and help it to release trapped water. Leave in place overnight.
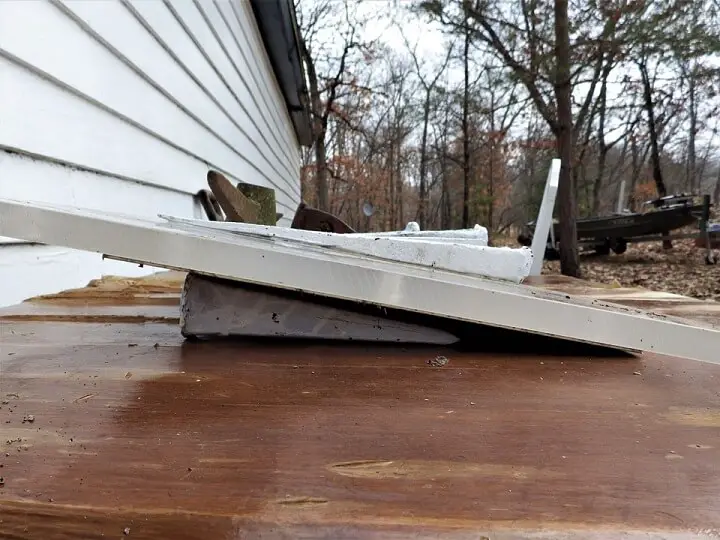
11. Slightly incline one end of the board or tile about an inch high to aid drainage.
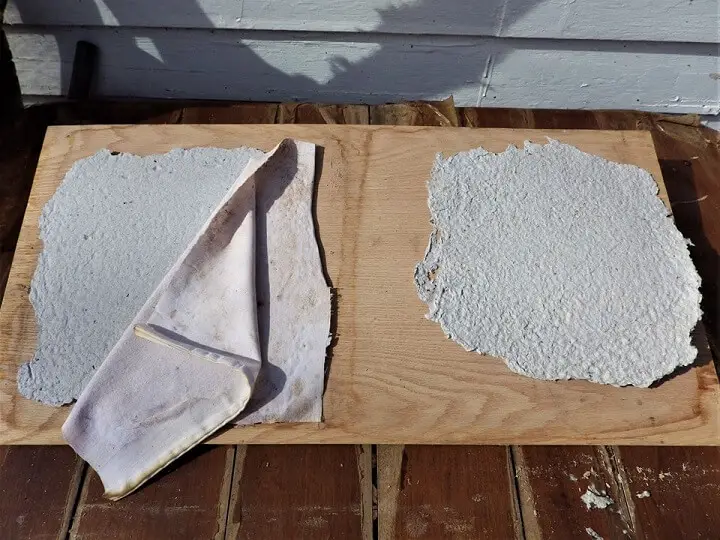
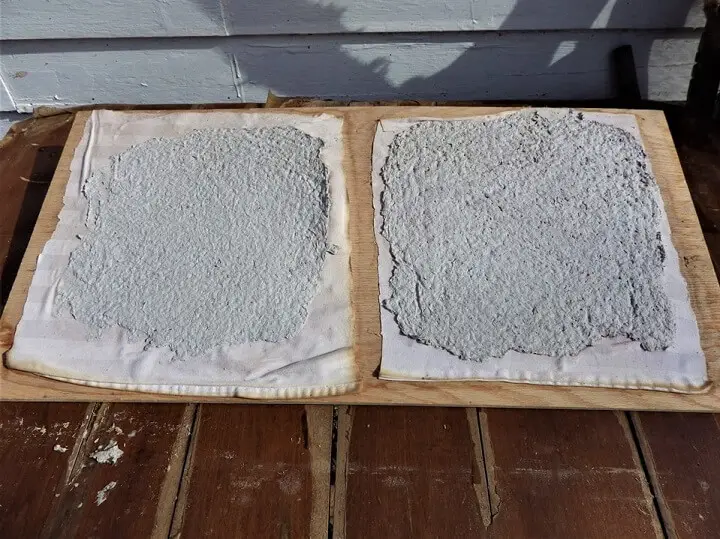
12. Remove the weights and the top surface and gently roll the paper with a rolling pin to thin it out some more and let it continue to dry for a few hours. Remove the top sheet of fabric (carefully) and let sit in a sunny spot where it can absorb some heat from the sun to dry.
13. After the paper has dried on the fabric to some degree, you can either bring the board inside to dry if the weather is chilly or if there’s a chance of rain, or you can hang it with clothespins to allow the sun and wind to further dry it.
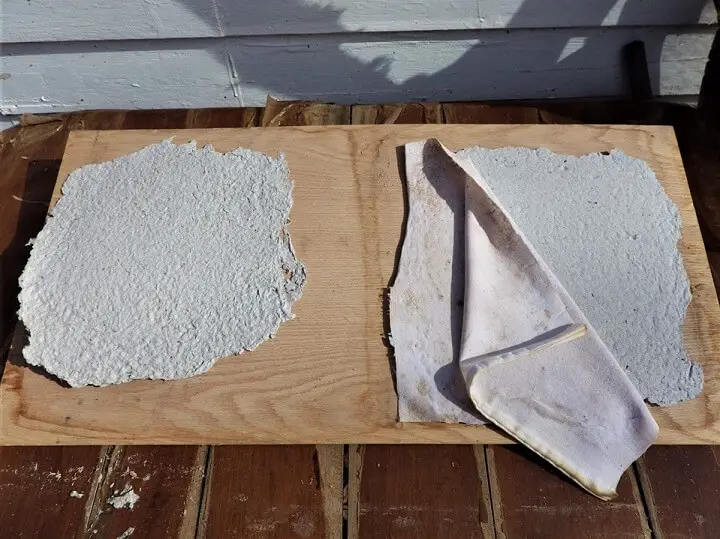
14. Carefully lift one corner of the paper and pull on both the paper and the fabric to release it. If the paper isn’t completely dry, bring it inside for a day or two to get it fully dry.
15. Trim the paper into 4” x 4” sheets approximating the size of a sheet of toilet paper and stack.
16. Give the paper a quick test by gently pulling on it to assess strength. You can also test a piece for dissolvability by letting it soak in water for 5 minutes. If you lift it and it disintegrates, you have the right combination for toilet paper that won’t clog your pipes and will be septic safe.
And remember, this is an emergency solution. If it works like toilet paper is supposed to, you’ve succeeded. If not, try try again.
Making Toilet Paper from Wood Shavings
You want to use natural timber for your wood shavings. Treated lumber often has chemicals in it that can harm or irritate the skin or compromise a septic system. Softwoods like pine and poplar are best. Hardwoods are bad.

Softwoods shave easier and separate into threads better when soaked. They’re also easier on your food processor, which you’ll need for this method.
And keep in mind, this is the extreme measure for paper making. I’ve included it in the remote event that even something as basic as recyclable paper becomes scarce.
If that happens, we’ll all have to be more resourceful and accept that everything might become a little rough around the edges, including homemade toilet paper made from trees.
Materials:
- A draw shave.
- A small pine or poplar tree log.
- 5-gallon bucket or other container.
- Water.
- Vinegar.
- Wood planes.
- Food processor.
- Two screens, one on top of the other to drain the pulp.
- Two flat surfaces for pressing.
- Weights for pressing (rocks, iron tools, bricks, logs, etc).
- 10 sheets of fabric cut into 1-foot squares.
- Clothesline and clothespins.
Directions:
1. Using a draw shave, remove the bark from the log or trunk.
2. Using your planer, cut long, thin curls from the wood. The thinner the curls, the better.
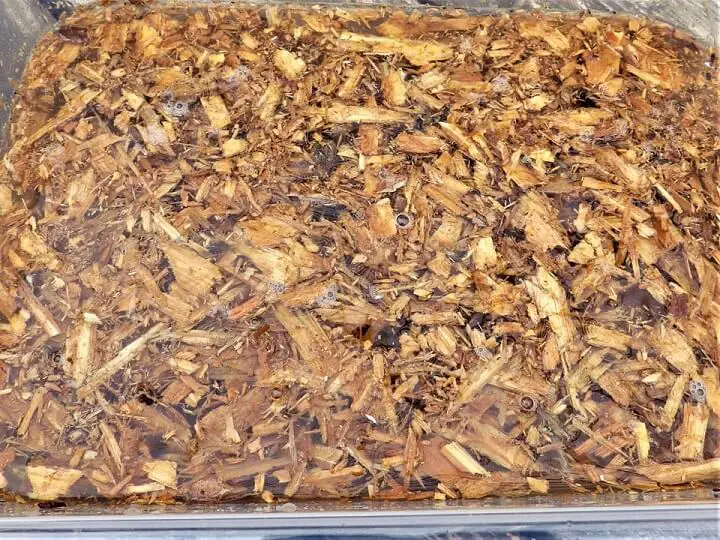
3. Drop the wood curls into your container and fill with water until the shavings float, then add 2 cups of vinegar. (Do not add any bleach! Vinegar and bleach create a toxic gas!)
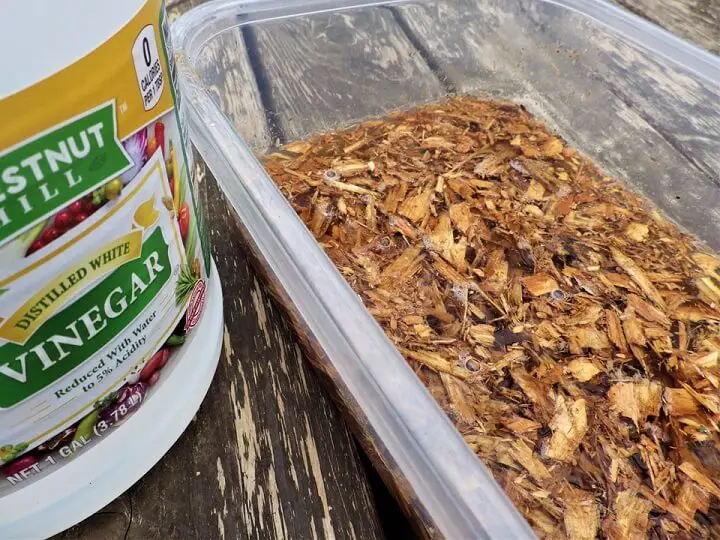
4. Soak for 24 hours.
5. Drop the wood curls into the food processor until it’s 2/3 full. Add enough water to reach the top of the curls.
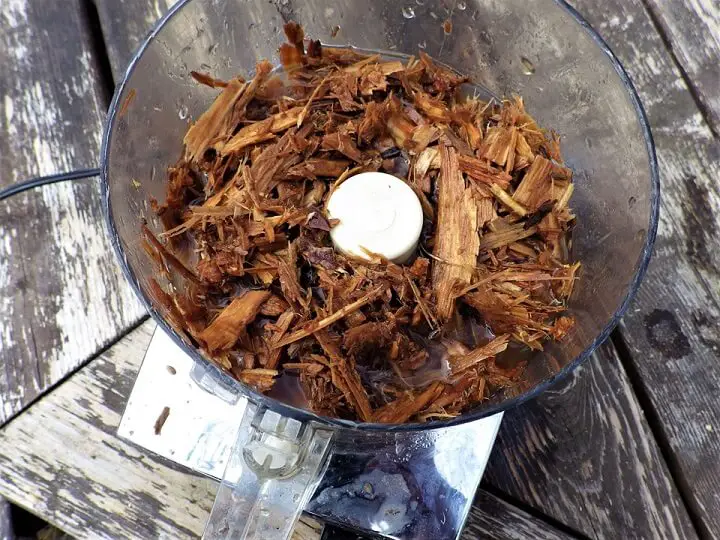
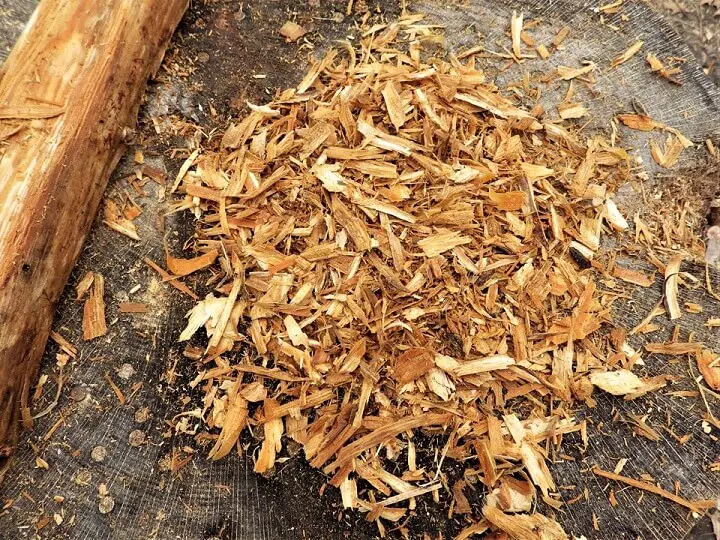
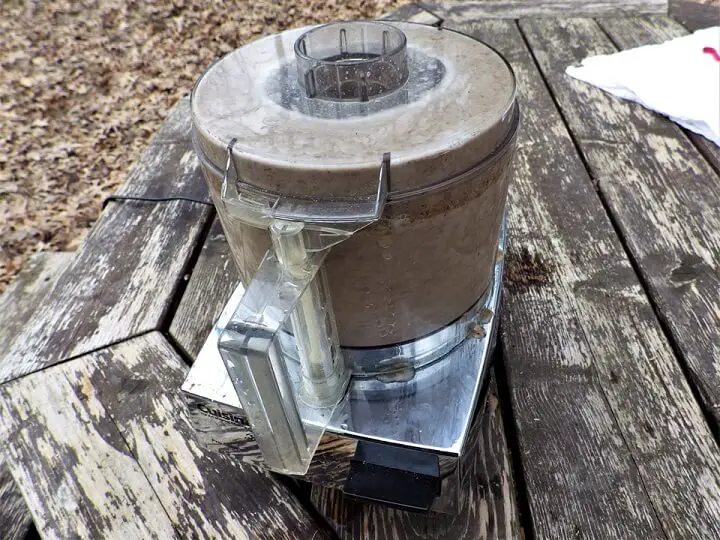
6. Pulse to begin shredding the curls into fibers. Add more water if necessary to keep a flowing slurry. If the processor jumps or resists while cutting, the wood curls are too thick. Discard and cut thinner shavings. Run the processor on regular speed until you have a slurry that is the consistency of porridge.
7. Scoop and drain the pulp using the slotted ladle.
8. Repeat the process described for pressing and drying recycled paper pulp until finished.
The critical thing is to reduce the wood shavings to the finest particles you can. If in doubt, return to the processor and process for another 5 minutes.
Critical Success Factors
- Water, water, water.
Don’t skimp on water when pulping. You want a loose slurry so the paint mixer or food processor can really whip around and work the material apart into pieces and make a good pulp. You’re going to drain and dry the pulp anyway and once the material is wet, it’s wet.
- Work it, work it, work it.
Don’t skimp on the time you spend pulverizing material. When you think you’re done, do it some more especially with the wood shavings. You want to reduce the shavings to fibers, and you want to reduce the recycled paper to a porridge. If the pieces of paper are too large or the wood shaving insufficiently processed, the result will be coarse and less absorbent.
- Experiment.
Between the two approaches, you’ll get a better result with recycled paper. The paper result tends to be softer and more absorbent. If you want, you can try blending materials by combining recycled paper with wood shavings. The paper pulp binds the wood pulp better and provides a softer result.
What’s critical is that you follow the specific process step for pulverizing each material, whether using a paint mixer for paper or a food processor for wood shavings.
You could also use the food processor for the paper, but if you are combining the two, pulverize the wood shavings first and the paper separately and then combine them in the food processor to work them together. And like I said, use plenty of water.
- Don’t, don’t, don’t…
Don’t try and use sawdust or wood pellets to make your pulp. Many of us heat our homes with pellet stoves and eventually notice that a wood pellet dissolves when wet.
The problem is that wood pellets are made from hardwoods, and no amount of beating, processing, and mixing will break them down sufficiently. They also lack the long fibers you get with planed wood curls from softwoods.
And don’t assume sawdust from a softwood tree will work. It takes industrial-strength machinery to convert things like sawdust into paper. Softwood sawdust may pulverize more easily, but once again, it’s lacking the long fibers that bind the finished result together.
It’s possible that a 50/50 mix of softwood sawdust and recycled paper could work, but your results will vary.
And Don’t Give Up
If your first attempts don’t meet your expectations, go back to the drawing board and pulp for a longer period of time. And just because some early experiments don’t come out the first time, don’t discard them. Either reuse them to pulp some more, or consider using them in place of paper towels.
With a little trial and error, you should get decent results. Hopefully, this turns out to be an educational exercise and not a constant effort to keep something as fundamental as toilet paper in stock.
Like this post? Don't Forget to Pin It On Pinterest!
You May Also Like:


Love this website. It’s informative n gives all kinds of ideas on how to save money n build things with little to no money. I haven’t tried the making of toilet paper yet but it’s next on my list of things to try till I get it right. Thanks to everyone that made the website for everyone to use. I know I’ll be spending most of my time on the website learning everything I can about homesteading. Keep up the good work guys n gals.
Grow mullein and flax. Harvest leaves and compost after wiping.
before the days of toilet paper there was mothers cloth. a 4″ x 4″ or a 6″ x 6″ piece of left over scrap cloth used, washed and reused many times in the weekly laundry. These were used for womens hygiene as well. Most households can come up with scrap cloth for the purpose. much easier to cut up old sheets, towels, shirts or even jeans than making toilet paper from wood chips. I just make a five gallon bucket of scrap cloth.
Hi, love the info on this site. Is there an actual book to buy? Would love to have handy instead of jumping on the internet.
Word of warning, this paper will NOT be pliable; it will be more like scrapping than wiping. I made paper in college during one of my art courses – it was stiff & tended to crack and break.
Fabric toilet paper is easier and washable! Like cloth baby diapers! After making these you stack in a box or basket by the toilet. You do need a place to put the used. A pail, paper bag, plastic bag or basket. When full empty into machine without touching wipes. I thought we would use paper for bowel movements and cloth for taking a whiz until we can not buy it any longer. I like flannel! Old sheets, robes and shirts. Cut 2 – 8″ sqs. for each wipe. Stitch around with a zig zag stitch and you are done!! For a better edge you can stitch and turn. Wash with bleach and detergent or antibacterial cleaner in a sanitizing hot water for 25 minutes. Dry on high heat in dryer. For baby diapers they were rinsed and wrung out then washed in bleach and detergent. Dried in dryer or hung on the line. They always came clean unless they were not emptied. I remember seeing a mens shirt on a line with poo on it. They were not washing properly back then. It is best to wash separately from the regular laundry! If you need to wash the wipes without a washer and electricity I would use a separate kettle, bucket or pail only for your wipes. heat water to a boil, add wipes and detergent and wash for 25 minutes in boiling water. Cool, wring and hang on line. Please look on line for any info to do this your own way!! Stay safe!!
If you have old newspapers, why to spend time for tedious process to make the paper? Just use it as is. People in poor countries use the newspapers as a toilet paper. Simply like that.
True, newspaper will work fine in a pinch, but the homemade toilet paper is a lot softer and easier to wipe with.
I just scoot on the carpet. Then 409 it.
This is absurd! Forget about making paper. Using the original materials would work as well. But a better, more obvious option is to make wipes from cloth. Keep used wipes in a bucket of vinegar water and wash daily, then reuse. If sharing with others is too icky, then assign certain types of cloth to each individual or mark the cloths in some way. Honestly, who has time to make paper?